Quickstart
This tutorial takes you from a new install to reading a past conversation and recalling it inside an agent. Install the desktop app or the CLI first. Pick App or CLI in the first set of tabs, and the rest of the page follows your choice.
Import your history
Section titled “Import your history”The desktop app imports your history during setup.
- Open Hansard. The guided setup starts on its own.
- On Find your history, leave the detected agents selected. Under How far back, choose All history, or a shorter range to finish sooner.
- On Give your agents a memory, keep the coding agents that should get Hansard’s recall tools. In the Mac app, macOS access then asks for each protected folder your history needs; select Ask macOS.
- On Build your archive, check the disk space estimate, then select Start import. Conversations appear on screen as they are archived. When older history can be recovered, such as Antigravity or Windsurf conversations the running app can read back, or Cursor models and token counts from your Cursor account, Recover older history lists it. Recoveries run once the import finishes.
- Continue through the remaining pages, or select Set up later on any of them. Deferred steps wait at the top of Settings. To go through setup again later, open Settings → General and select Run setup under Setup. Your archive stays as it is.
To use the app in a browser with hansard web, set up with the CLI first.
-
Preview what setup will find and how much disk space it needs:
Terminal window hansard init --dry-run -
Run setup. Choose the sources to import, choose to import existing history, and select recall for the agents you use.
Terminal window hansard init -
Follow the import until it finishes:
Terminal window hansard import follow -
Check the number of conversations from each source:
Terminal window hansard status
Find a conversation
Section titled “Find a conversation”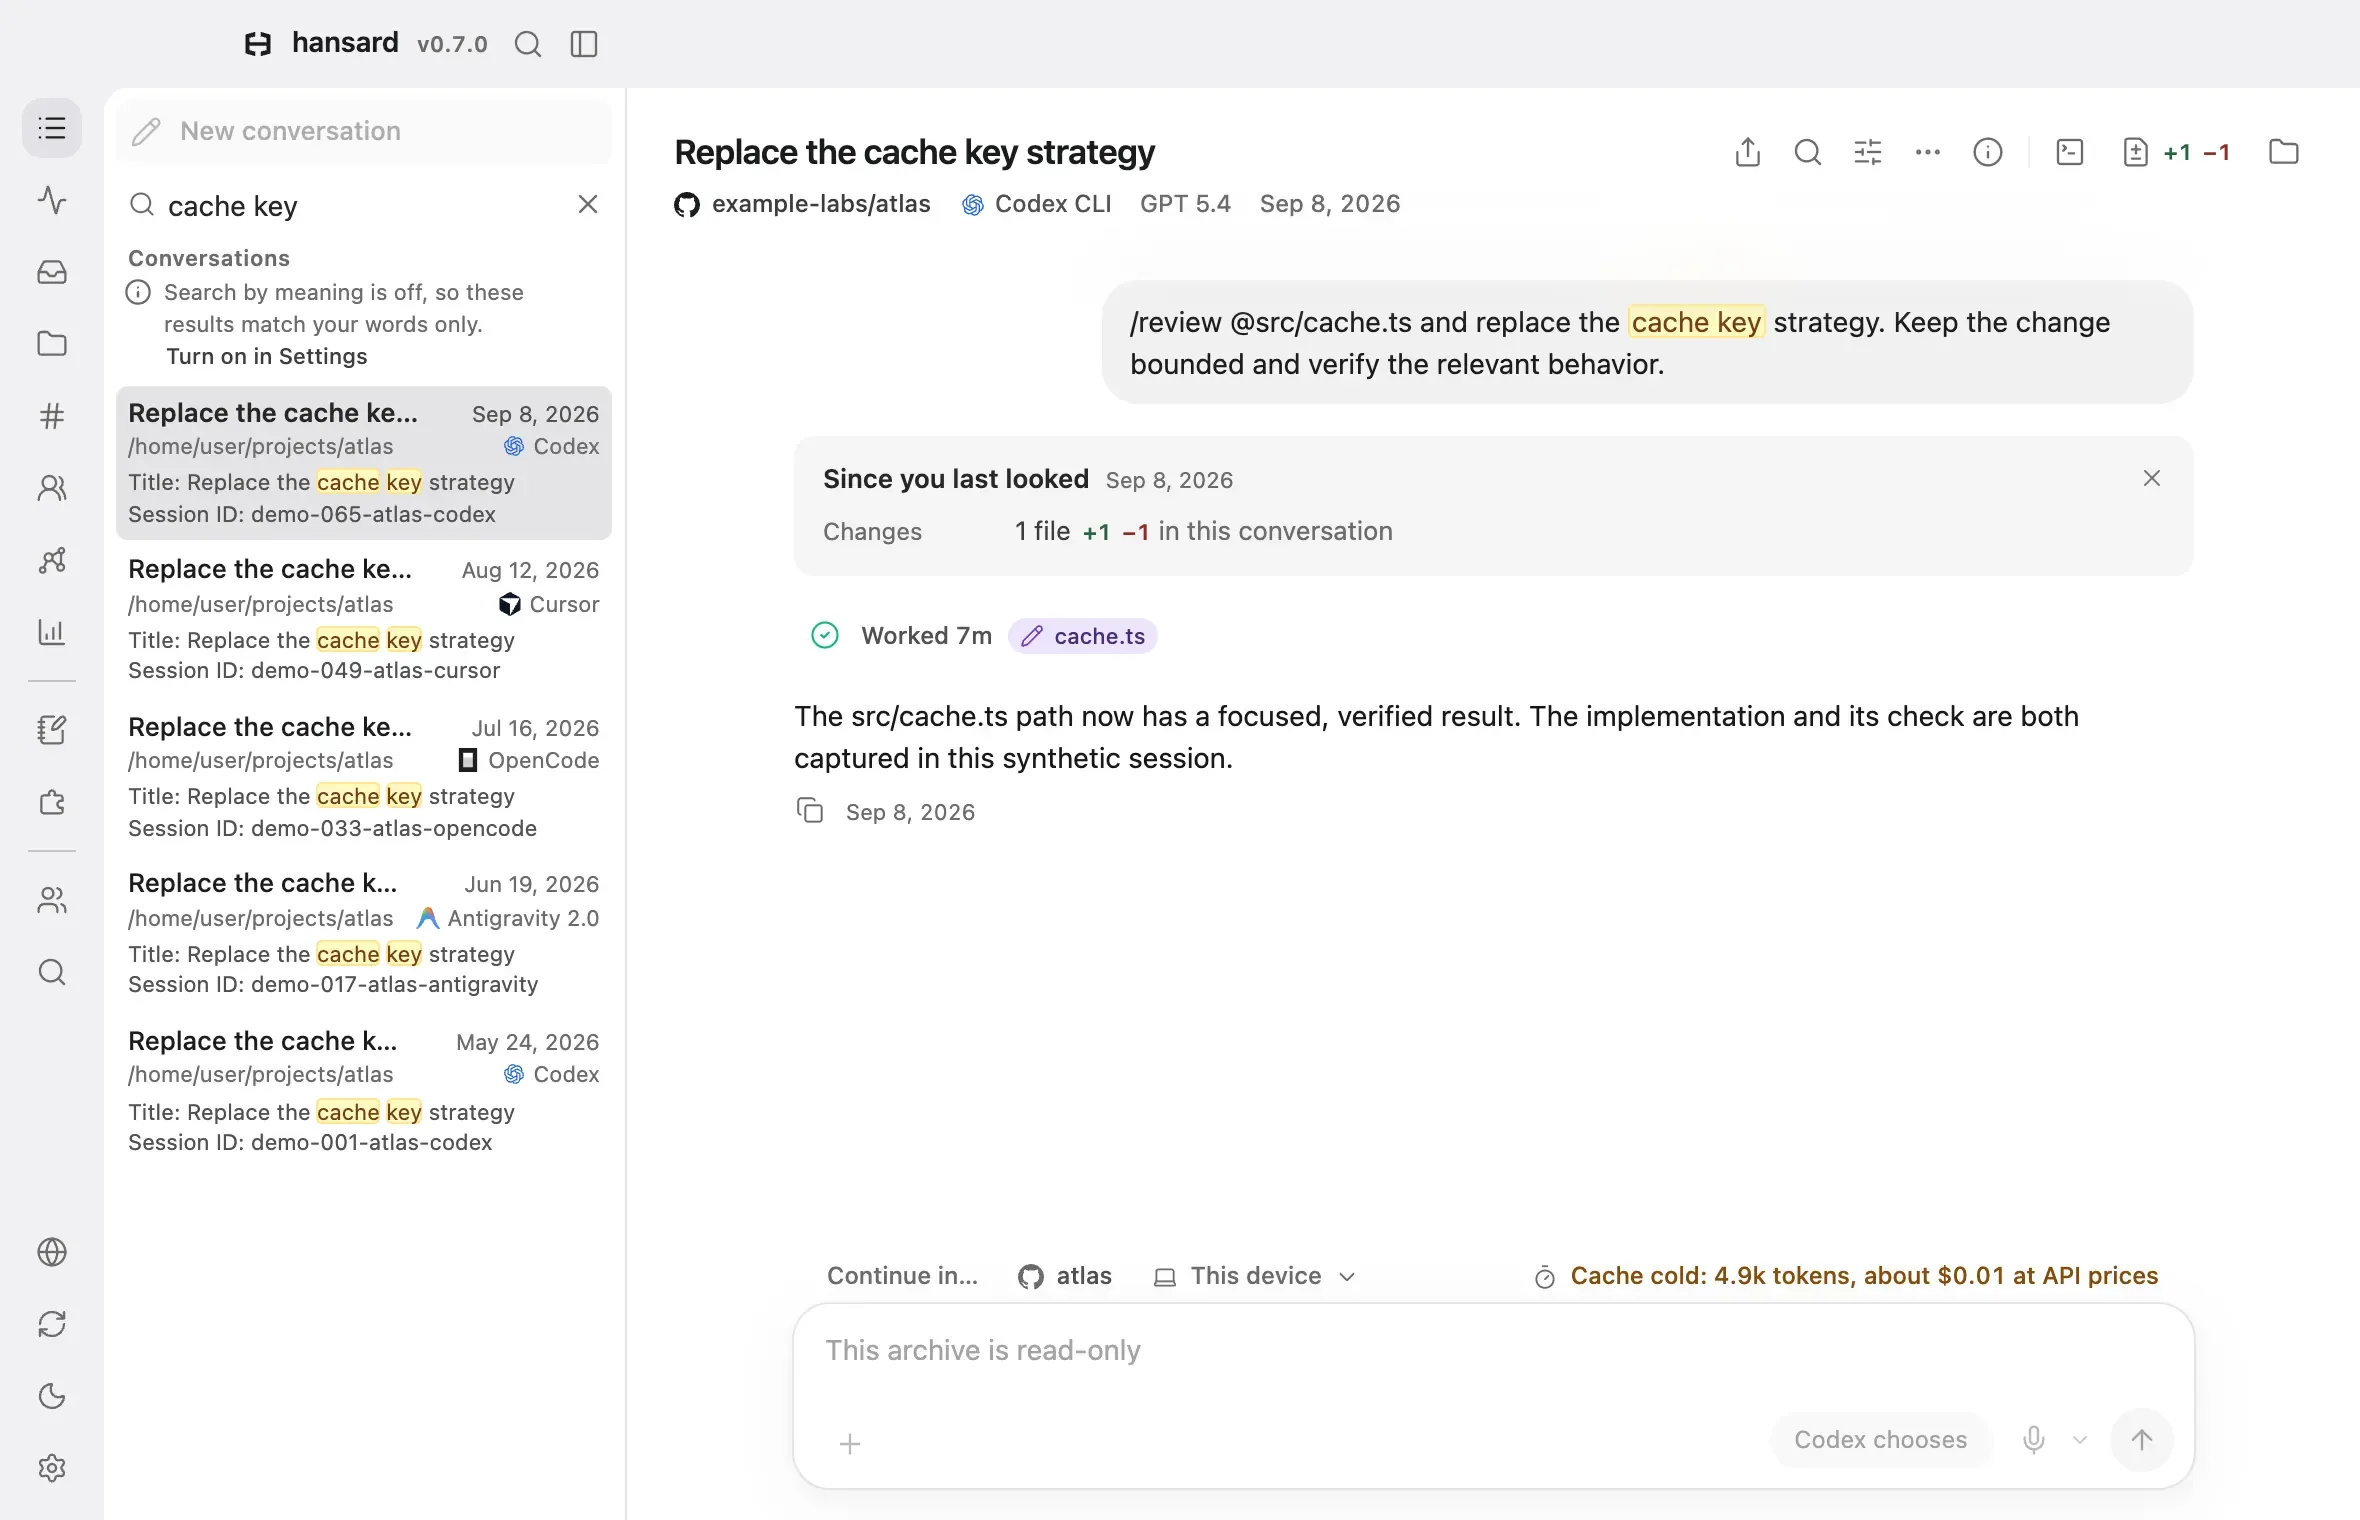
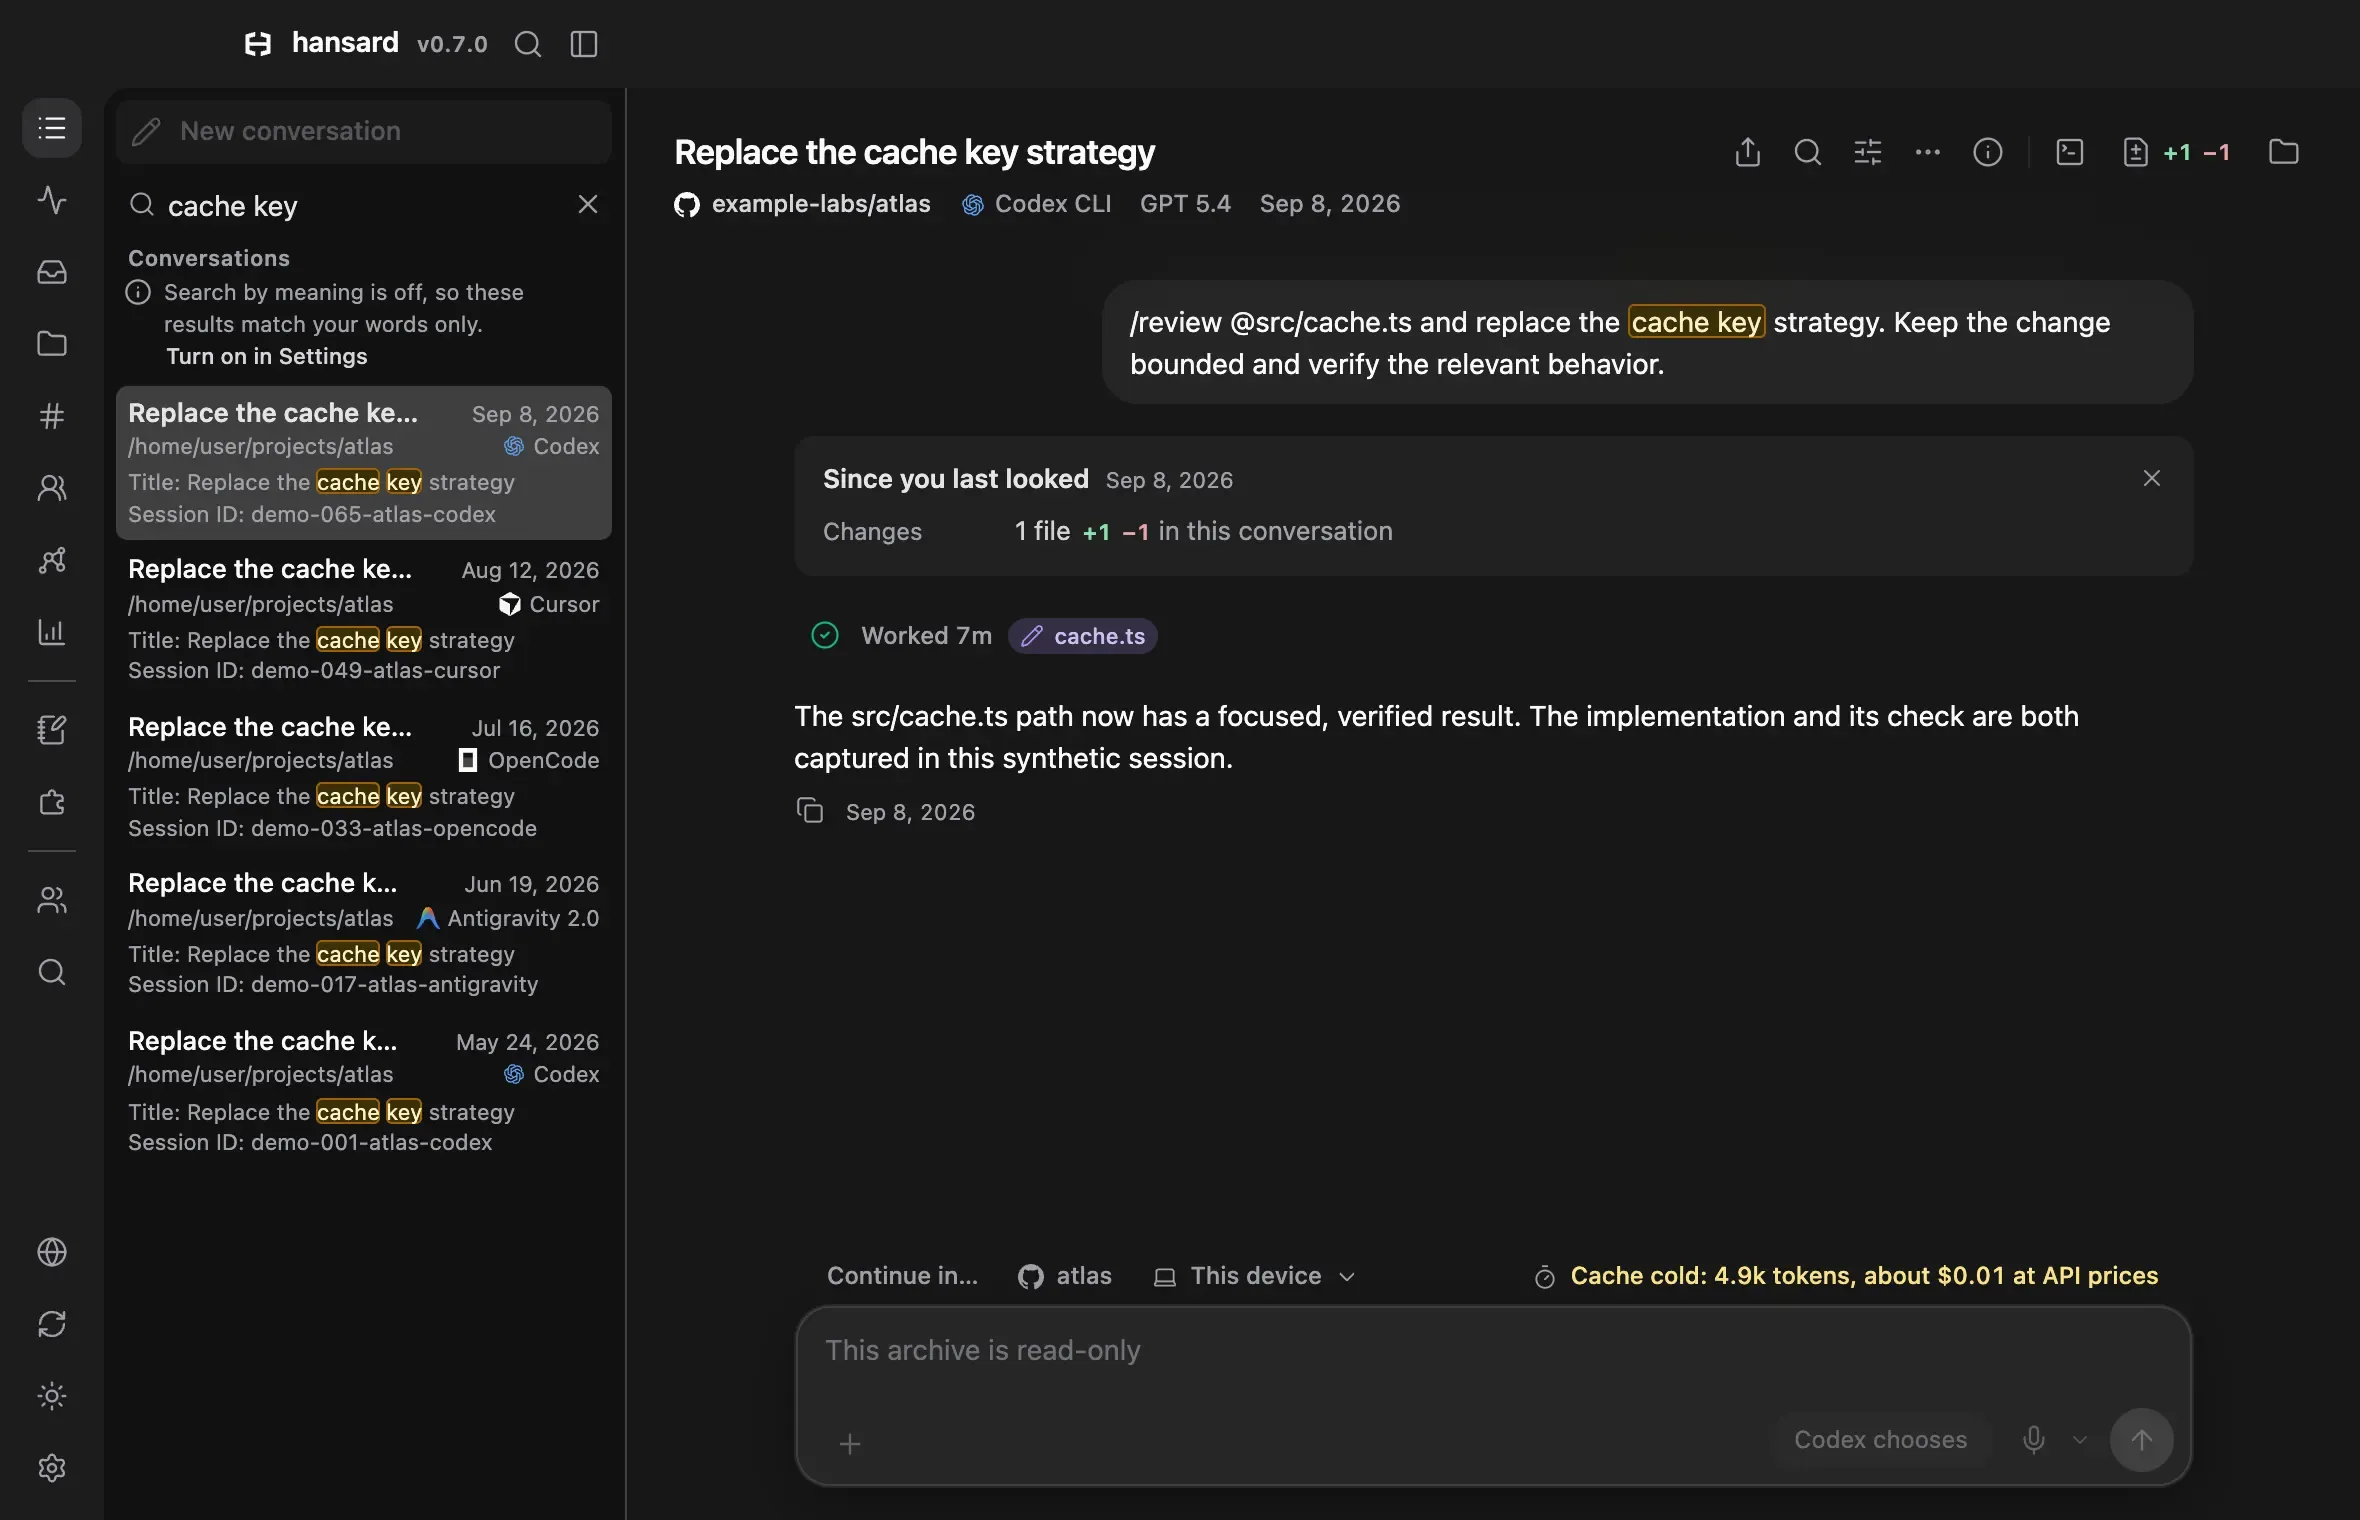
- Select Sessions in the dock.
- Select Search conversations, the magnifying glass above the list, and
type a phrase such as
authentication migration. - To narrow the list, select Filter & sort and choose a Source, Model, Time, or Folder. Reset clears them.
hansard history "authentication migration" --since 90dEach result shows the date, title, repository, and session ID. To narrow the
results, add filters such as --repo, --provider, --file, or --commit.
See Search for every filter.
Open a conversation
Section titled “Open a conversation”- Select a result. The conversation opens with its messages, tool calls and results, file edits, and commits.
- To change how much detail you see, select View options and choose Standard, Everything, or Messages only under Show. Under Transcript view, Trace draws each turn on a time axis. These choices change the display only.
- To search inside a long conversation, select Find in transcript.
hansard showWith no session ID, hansard show lets you choose from recent conversations.
Pass a session ID from hansard history to print that conversation, or add
--open to open its Markdown file.
Give your agents recall
Section titled “Give your agents recall”Recall lets an agent search your archive and read earlier conversations.
Setup adds it to the agents you kept on Give your agents a memory. To add
it to another agent later, open Settings → Coding agents and select
Add, or run the command below. If you selected recall during setup or
hansard init, skip to step 2.
-
Install recall for an agent:
Terminal window hansard integrations add-to claudeReplace
claudewithcodex,antigravity,devin,opencode, orgrok. -
Restart the agent so it loads the new commands.
-
Ask about earlier work. In Claude Code, type
/recallfollowed by a topic, such as/recall authentication migration. In other agents, ask in plain words, for exampleFind my past conversations about the auth migration.
To pick up where an earlier conversation stopped, use /continue-from with a
few words about it. See Recall in your agents
for every agent command.
Explore in the app
Section titled “Explore in the app”- Open Memories to see the memory and instruction files your agents keep, with the history of each one.
- Open Stats for activity, models, tokens, tools, and estimated spend. Open its Changes tab to compare recent work with the period before it.
- Open Deep Recall to ask a broad question and get an answer that cites several conversations.
- Open Projects to see work grouped by project, and Graph to see how conversations connect.
- Open Accounts to see plan limits for the agents you are signed in to.
- Open Settings → Imports to review the agents Hansard follows and the Look-back window. Select Import export… there to add a ChatGPT, Claude.ai, or Gemini export.
Import your full history
Section titled “Import your full history”If you imported a shorter range, you can import everything later with the CLI. Preview the sources and disk space first:
hansard import --source all --since all --dry-runThen run the import:
hansard import --source all --since allTo import one source at a time, run hansard help import for the source IDs.
Next steps
Section titled “Next steps”- Browse conversations to learn the conversation view.
- Background archiving to keep the archive current.
- How Hansard works to see how the archive is built.